These Crafts for Toddlers Are Perfect for Spring
Updated May 1 2023, 12:03 p.m. ET

If you're a crafter, you know how much love, care, and thought is put into every project. Whatever your medium, it's a great way to feel productive, pass the time, and create something truly unique. Because of that, it's no surprise that you're looking to pass down such a great skill set to the next generation.
Luckily, many creative hobbies can be started at any age. And there are plenty of great spring arts and crafts for toddlers that will get them engaged in something new and let them have all kinds of fun. Here are three ideas to try out.
Cards with fork-painted flowers
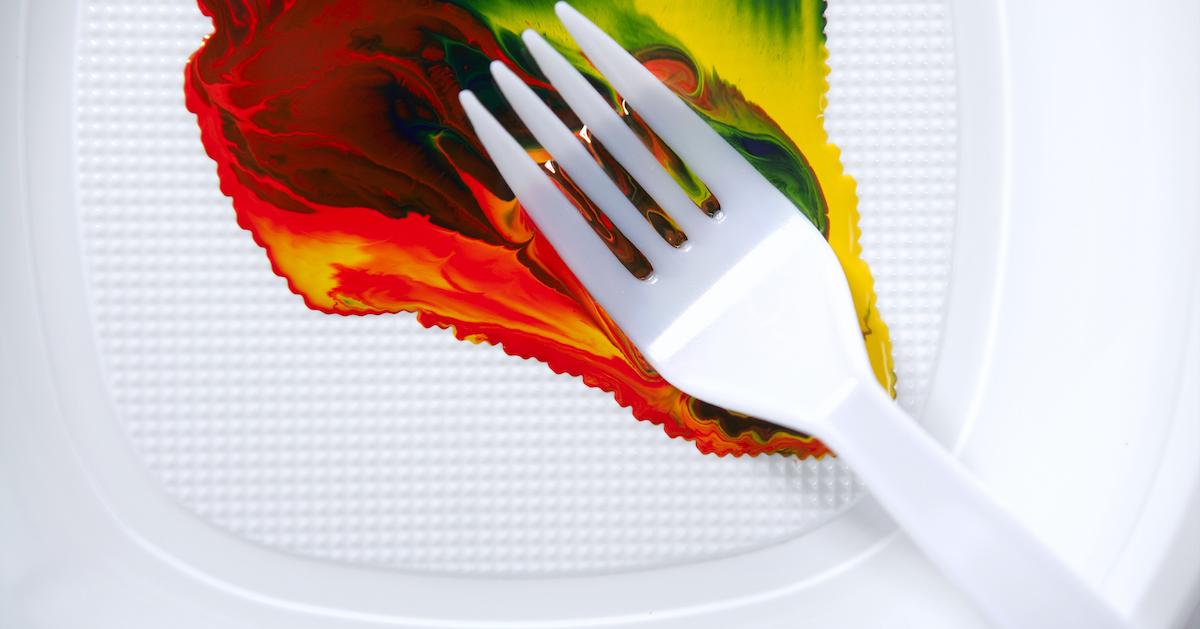
If someone in your life has a birthday this spring, one of the greatest gifts you could give is something handmade. These cards by The Best Ideas for Kids are simple, but you can add anything you want to them beyond these steps. Here's what you need:
- A fork — any kind or size will work. Consider using multiple sizes for different flowers
- White and colored cardstock
- Paint — non-toxic acrylic is suggested by The Best Ideas for Kids
- A flower pot template
- Paintbrushes
- A paper plate
- Glue.
To get started, pour out your paints on the paper plate. Then, fold your cardstock in half to make your card. The Best Ideas for Kids uses white cardstock for this, but you can make your card any color.
After that, dip your fork into the paint. Make sure that you cover the entire back of the fork with paint to get the full effect. Then, press the fork onto the front of your folded cardstock. The tutorial says that you should make three flowers per card.
Either with your fingers or a paintbrush, take some green paint to make the flower's stems. Make sure the paint goes down far enough to be covered by the pot you're going to make. Cut another color of cardstock into your vase.
To make creating the vase easier, The Best Ideas for Kids has a printable template your kiddo can trace. Then glue to the front of the card making sure to cover the ends of your stems. You can also use green cardstock and cut out some leaves as well. After that, you're done! You can continue to decorate or move on to the inside of the card with whatever heartfelt note you'd like.
Homemade playdough
Taming Little Monsters points out that playdough is a great playtime tool for kids, but the store-bought ones can dry out too quickly. To solve this, you can make your own plant-based playdough that lasts much longer with your little one. Here's what you need, according to Taming Little Monsters:
- 1 cup of all-purpose flower
- 1/2 cup of salt
- 1/2 tbsp of cream of tartar
- 1 tbsp of vegetable oil
- 1 spoon
- A large bowl
- 1 cup of water that's been recently boiled
- Food coloring — get a few different colors
- Flour.
To start, mix all of the dry ingredients together in the bowl. Then add the hot water and vegetable oil and mix that in as well. The texture should look clumpy but you should keep mixing until small balls start to form. Then, knead the dough together. Taming Little Monsters says that if you want the end result to be very smooth, you should cook the kneaded dough on your stovetop on a medium heat until it looks the way you want it to.
If your mixture is too wet, add some flour to dry it out. If it's too dry, add some more water. The texture of the playdough is up to you. When that's done. create a small dent in the dough and add a few drops of food coloring. Keep in mind that the more you use, the darker the color will be. Then, all you have to do is knead it one more time until the coloring is absorbed. Store this in an airtight container to help it laster longer.
Felt raincloud
For so many of us, spring means lots of rain. So why not embrace this time of the year with a friendly raincloud of your very own? Here's what you need for this project, as detailed by the Instagram page @ecocraftkids:
- Felt — in gray black, white, and pink
- Stuffing
- Yarn — in gray and white
- A large sewing needle
- A hot glue gun
- Blue beads
- Scissors
- A yarn needle.
To start off, cut the gray felt into the cloud shape you'd like. Make sure to cut two of these and that they are the exact same shape. It may be best to find a stencil and follow that to be safe. Then, take the gray yarn and sew most of the clouds together.
Before you close it all the way, add in your stuffing. Adding too much will make it difficult to sew closed, according to Eco Craft Kids. Once, you've got enough, sew the rest of your cloud together.
Now, take your white and black felt and cut circles for the eyes. Layer them on top of each other to make the eyes look however you want. Then use your hot glue gun to attach them to the cloud. With the pink felt, cut out a shape for the mouth and glue that on as well.
Lastly, attach the white yarn to the bottom of the cloud and add your blue beads to make rain. Using different shades of blue can create an eye-catching effect. Knot off the bottom of the yarn to secure your beads and you're done.
Thanks to The Best Ideas for Kids, Taming Little Monsters, and @ecocraftkids for these three fantastic ideas!