A Step-By-Step Guide on Taking Photos on the Northern Light With an iPhone
These tips will help you capture the stunning light show.
Published Oct. 1 2025, 3:22 p.m. ET

The Northern Lights are a beautiful phenomena that happens when the sun ejects super charged particles into space. They get picked up by the solar wind, which blasts them across space. Sometimes, these particles will enter the Earth's magnetic field.
When this happens, they enter our planet's atmosphere at either of the magnetic poles, creating the beautiful appearance of the Northern Lights (which is also known as the aurora borealis).
Because of the way these particles arrive on our planet, they are traditionally only viewable in areas known as Auroral Ovals, which can be found near the poles.
However, more recently, people in other areas of the world have had a chance to witness the beauty of the Northern Lights, which have left some wondering how best to take a photo of them with an iPhone.
Fortunately, these phones are equipped with some special settings that make this easy, and you can learn how below.

What's the best way to take a photo of the Northern Lights with your iPhone?
The writer behind the Fjords and Beaches blog has offered up some explanation on how to take photos of the Northern Lights with your iPhone as a native of Norway. She says that the good news is that it's quite easy to capture the lights with a smartphone, as long as you're able to head somewhere with minimal light pollution to do it.
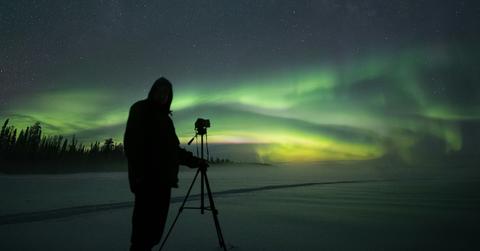
Once you get there, she says you'll need some sort of stable place to put your phone, which could mean propping it up on a sturdy surface or using a tripod.
Next, you'll want to experiment with some of the various settings on your phone to find one that gives you the look you're hoping for. Her preferred method involves using the "night mode" setting, which can be found on the iPhone 12 and more recent models.
You'll also want to turn your flash off, which will help optimize the low-light settings. Then, you can use your finger to slide brightness scale up or down, depending on how bright the Northern Lights appear on screen.
When the lights appear faint, you can increase the amount of time the shutter stays open while you're taking a photo by tapping the arrow that appears in the middle of the top of your screen. This will give you access to more advanced settings, including your shutter speed.
The blogger also suggests taking a few different photos using a mix of these settings to find what you're looking for, and making adjustments after each shots since the intensity of the lights can change.
Some older phones may have different settings, according to a tutorial from Expedia, which suggested putting your iPhone into night mode and then sliding the shutter timer over to 10 seconds.
Where is the best place to go to see the Northern Lights?
Now that you know how to capture them, you may want to know where to head to get the chance to photograph them. According to Travel + Leisure, the best places to witness the lights are located in the Arctic, which includes portions of Iceland, Finland, Norway, and Canada.
For U.S. residents who don't want to travel too far, you may also be able to catch a glimpse of the light show in areas of Maine, Minnesota, and Alaska, depending on the time of year and sun's activity.