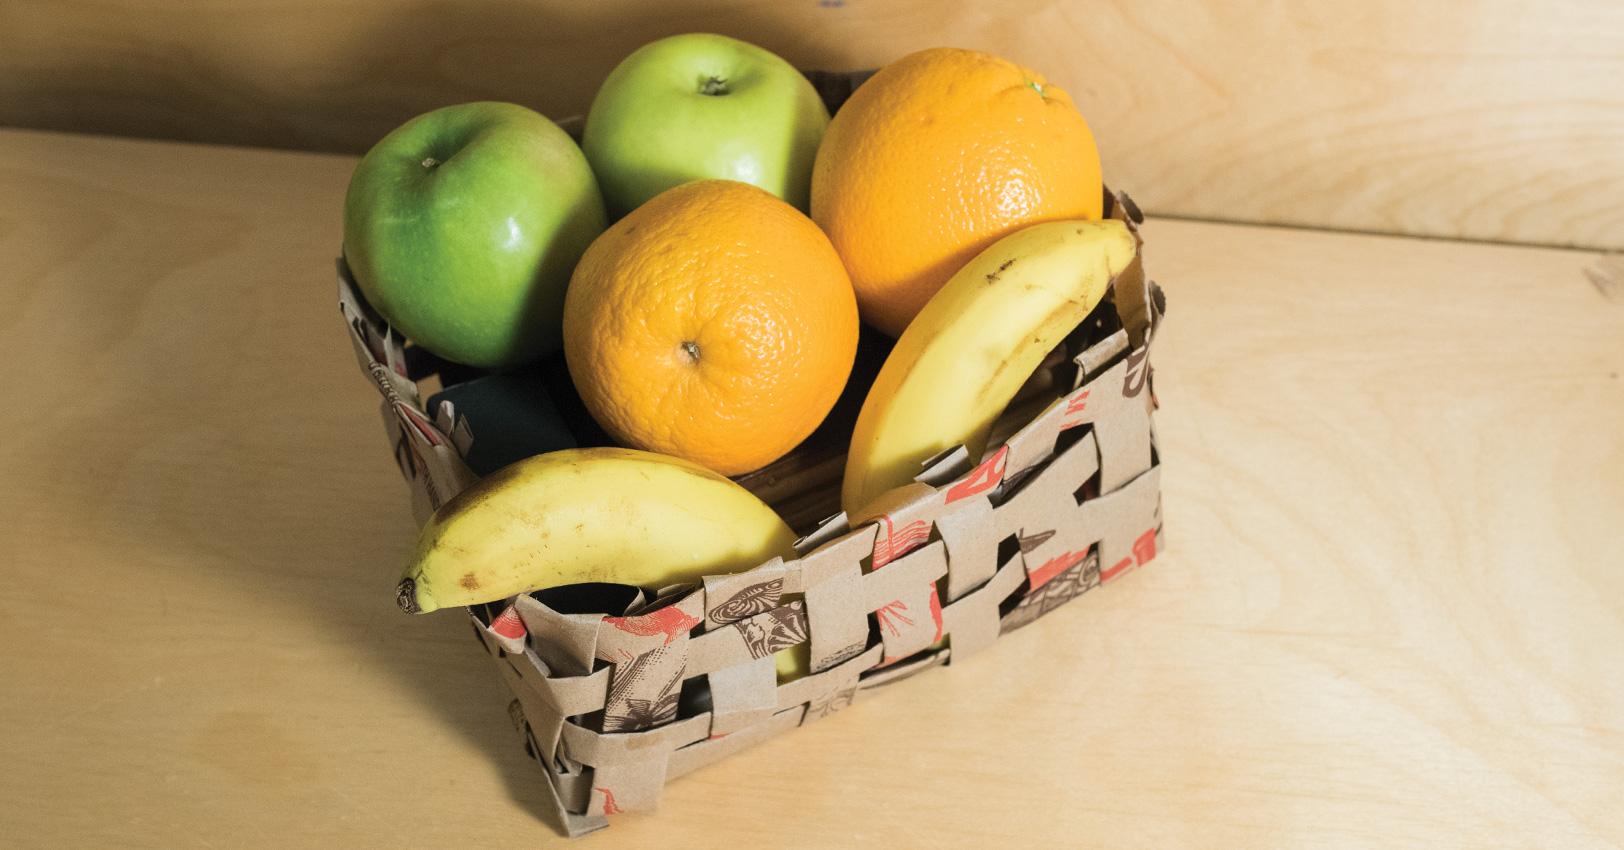
How To Create An Upcycled Basket With Old Paper Bags
Repurpose your old grocery bags into a DIY fruit basket.
Updated May 13 2019, 5:30 p.m. ET

People have been weaving baskets basically since the dawn of time, gathering whatever natural materials they could find to create compact and beautiful pieces. Different civilizations have used reeds, grasses, canes, or bamboo for their baskets. Today, we’re going to forage something simpler: old paper bags.
For this DIY upcycling project, we’ll be creating a square paper basket perfect for apples, oranges, or any grab-and-go snacks in your kitchen. You don’t even need to make a shopping trip for supplies, since this craft relies on common household items. The technique is simple and tested — basket weavers have been practicing it for centuries and trust us, you can, too.

What You’ll Need
Scissors, ruler or measuring tape, glue, and paper (we used bags from Trader Joe's, but newspapers, wrapping paper, construction paper, or even old road maps will work).
Step 1
Remove the base of the bag and any handles. Flatten the remaining paper.
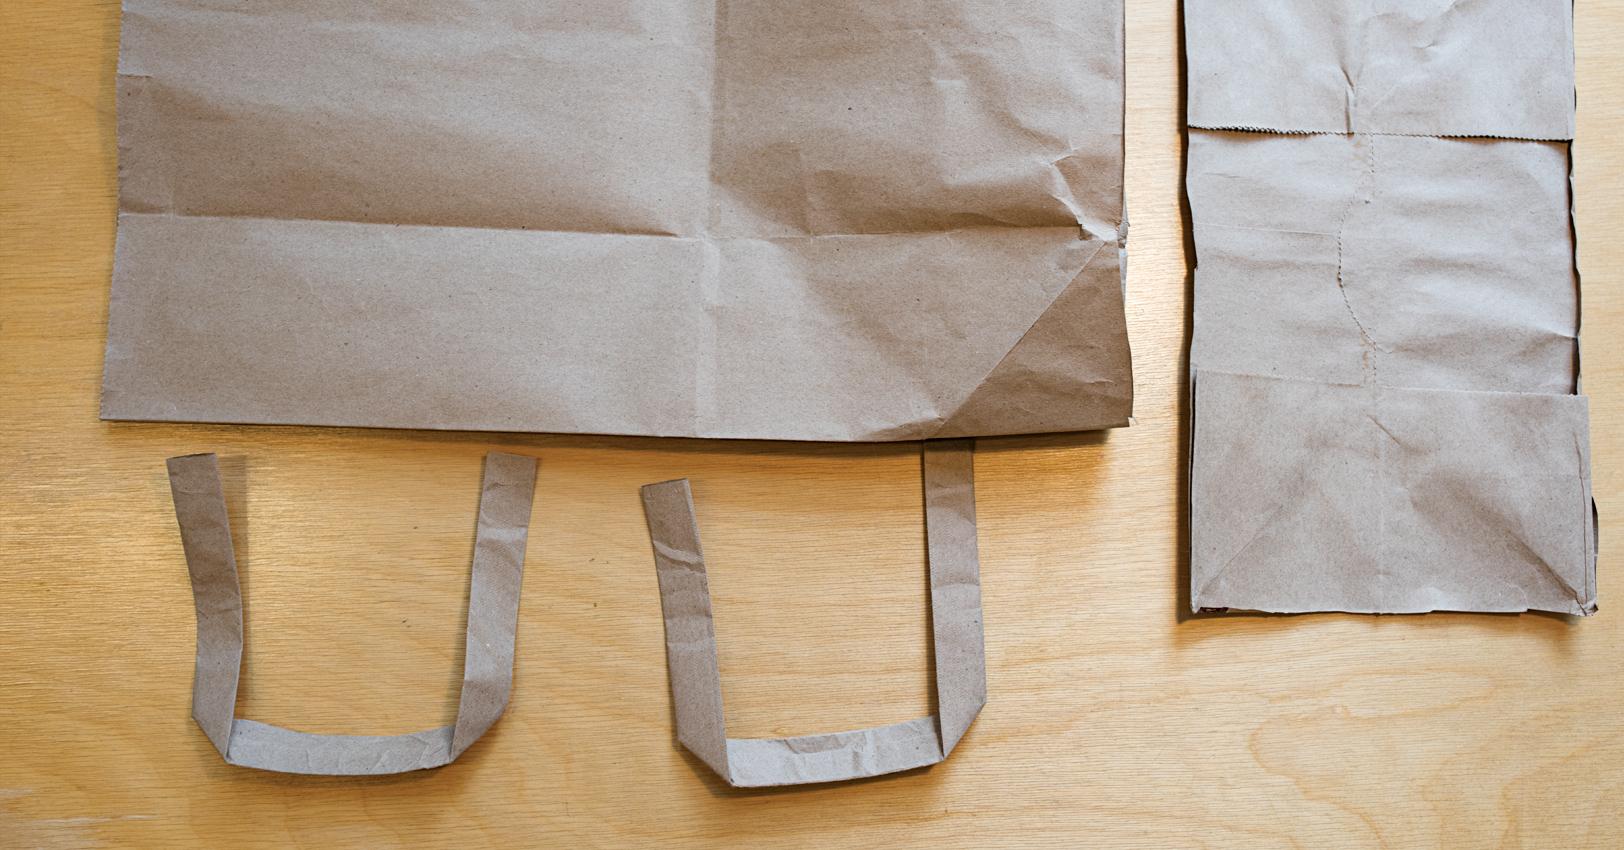
Step 2
Cut the bag into strips that are 1.5 inches wide. (Use your ruler or tape to measure those out!) If you’re using grocery bags like us, the strips should be about 17-18 inches in length. Keep cutting until you've run through a whole bag, which should be roughly 22 strips.
You will also want to cut 4-5 longer strips, measuring about 30 inches, for the sides of the basket. So break out another bag for those. Cut a slit down one side of the grocery bag and unfurl the entire thing for added height.

Step 3
Fold the sides of each strip into the center, as shown in the picture above.
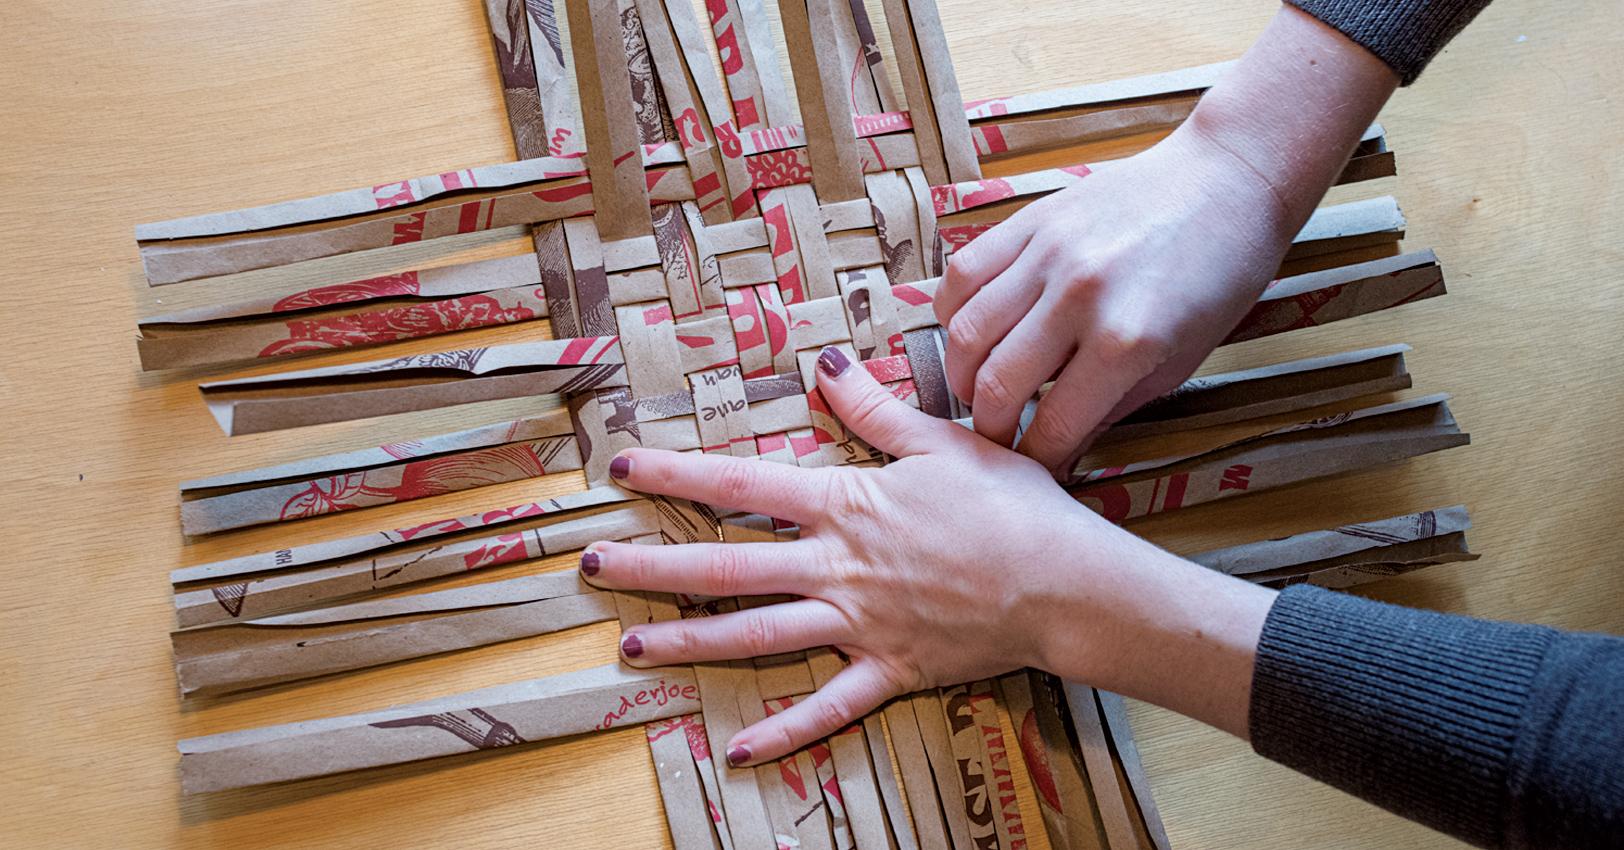
Step 4
Lay out eight strips horizontally. Now, start weaving eight strips into them vertically. This will form the base of your basket. If you want to make your basket bigger, simply add your extra strips.
Step 5
Secure the corners with glue. Then fold up the ends of the strips, so they stand at a 90 degree angle from the base.
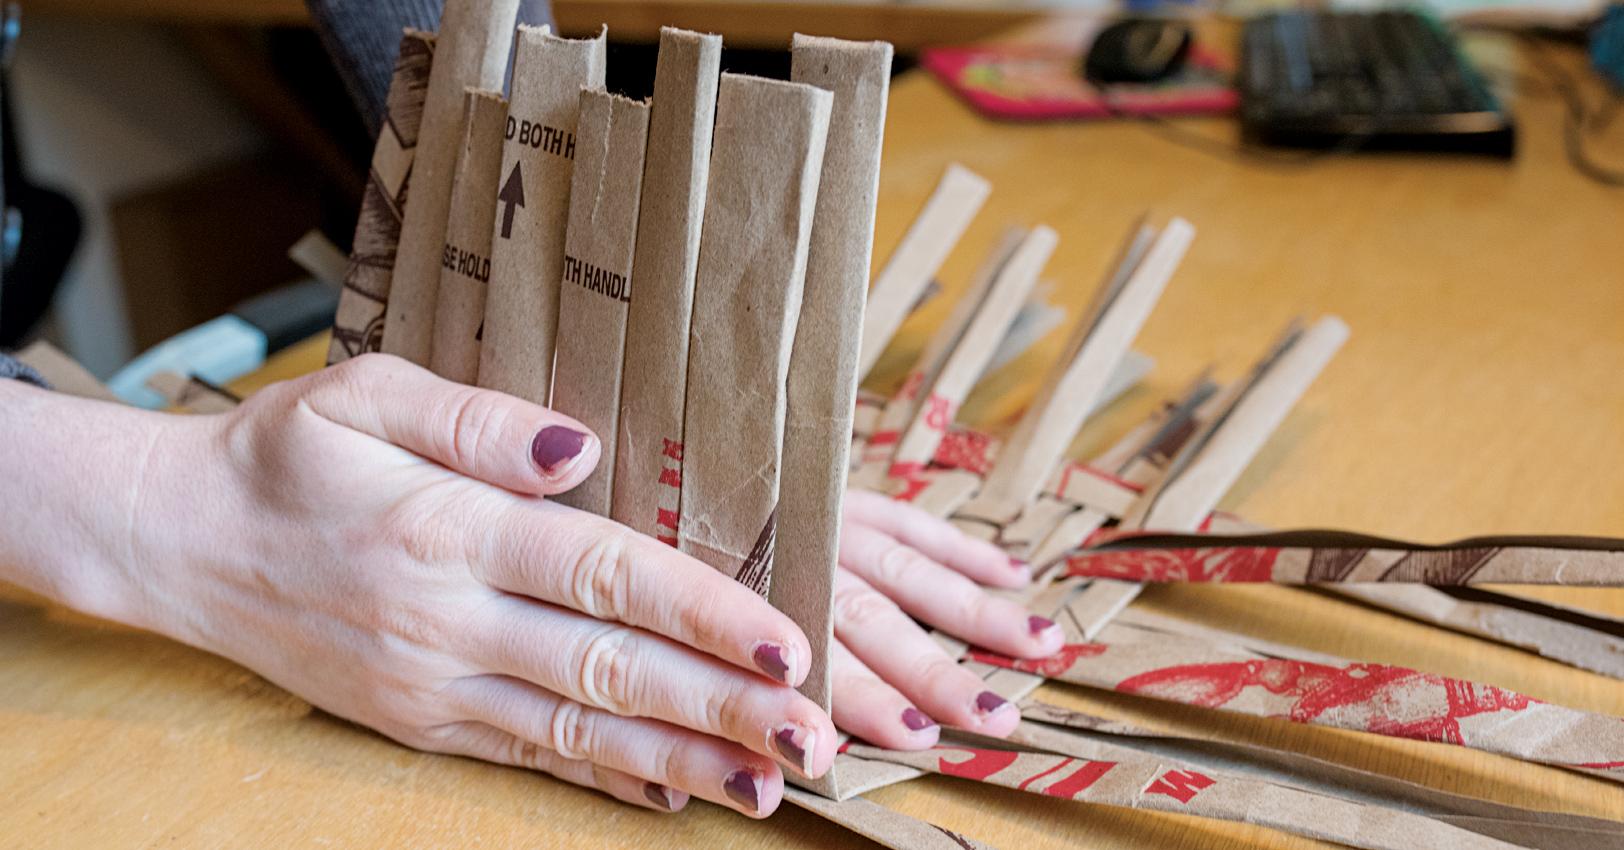
Step 6
Weave the longer strips around the sides.
Step 7
Fold the top edges of the basket into the inside and secure them with glue. After your glue has dried, your basket is ready to use! Pile your food inside and enjoy.