9 Easy Ways To Grow Microgreens In Any Setting
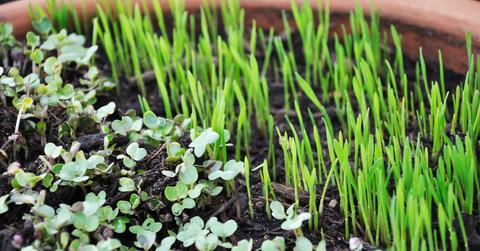
Microgreens are unicorns in the food world. They go from seed to table in less than two weeks, require minimal effort to grow, are nutrient-dense, and make beautiful additions to any dish. Here are nine microgreen-growing tips for any setting.
Updated May 18 2019, 6:19 a.m. ET
Microgreens are like magical unicorns of the food world. They go from seed to table in less than two weeks, require minimal effort to grow, are nutrient-dense, and make beautiful additions to any dish. Gardenista recently spoke with Conor Fitzpatrick, owner of Minifarm Box, a Los Angeles-based company selling a starter grow kit called the Microgreens Crate. Fitzpatrick offered nine easy tips for growing your own edible microgreens right on a sunny windowsill, no matter where you live.
1. Let the sun shine in.
If it’s summertime or you live in a warm climate year-round, go ahead and put your microgreens outside if you have the space. For everyone else, a sunny, south-facing window will do.
Don’t have nice natural light at home? Invest in a $40 grow light that can be screwed into any desk lamp socket. Voila: instant sun. Fitzpatrick tells Gardenista the consistent light “gives you more robust crops, with better flavor, color, and longer shelf life.”
2. Let the water drain out.
Your microgreens dig irrigation, but not swamp. Make sure your tray is at least 1.5 inches deep with plenty of drain holes.
3. Use only the lightest, fluffiest soil.
The enemy of microgreens is hard, compacted earth. Fitzpatrick recommends seed-starting mixes like EB Stone’s Seed Starter Mix, but any light, fluffy soil will do (freshly composted dirt is great for this). Fill your tray with an inch of the soil, and fully wet it with a spray bottle of water. You want the soil wet, but not dripping.
4. Grow microgreens from a variety of seeds.
Microgreens aren’t just for lettuce! In fact, one 2012 study found that microgreens from cilantro, radish, and red cabbage have upwards of 40 times the nutrients found in their fully grown versions.
So think bigger! “I really like sunflower microgreens, but there’s lots of interesting stuff out there, including radish, micro basil, bok choi, red amaranth, arugula, broccoli, and mustard greens,” Fitzpatrick tells Gardenista.
5. Don’t agonize over seed-spacing.
One of the trickiest parts of gardening is seed-spacing while planting. It seems like everything needs different distance. Then there’s the thinning, trellising, and training. Sometimes it can be a little overwhelming.
Not so with microgreens. “It’s not an exact science,” Fitzpatrick tells Gardenista, “so don’t worry if you find yourself over-seeding. I find more is better than less.” For microgreens, since you’re picking them so young, you can basically just sprinkle the seeds as evenly as possible in your tray. If you want to be more precise than that, try planting seeds about one-eighth of an inch apart. Then, just cover them with another half-inch layer of soil. Spray everything down—again, wet but not dripping.
6. Forget the fertilizer.
Within three to five days (slight variations are to be expected depending on which seeds you’re planting), you should see shoots. Microgreens are the first seeds to sprout on a plant, so they only need sun and water—no fertilizer required.
7. Mist, don’t water.
Microgreens dig a light misting from a spray bottle. Their delicate leaves and shallow tray won’t allow for a torrent of rain from a watering can—you don’t want to drown those leaves!
8. At harvest time, grab a pair of scissors.
When your microgreens are ready (in less than two weeks!), just grab a pair of scissors and cut the plants just above your soil line, as much as needed. Rinse the greens in some cold water, and they’re ready for your plate. If you don’t cut them all at once, and depending on the size of your planting tray, you should have a supply for several meals—or even a week or two of supply.
9. Turn your mat over and start again.
The roots left over from your microgreens will compost into the soil and add nutrients—so all you need to do to replant is flip your mat over and scatter new seeds.
To have a steady supply of microgreens, a week after you start your first tray, start a second. Then when one is ready, you can clip, flip and plant just as the second tray is coming into it. Growing your own cuts down on emissions from transporting the greens to your door, saves you hundreds of dollars every year that you’re not spending on supermarket salads, and adds a healthy boost to your diet.
